Painting can be a rewarding but messy task, and one of the most frustrating aspects is the clean-up, especially when it comes to high-quality brushes and rollers that cost over ten or twenty bucks (referred to Dulux and Bunnings brush shops). If not cleaned properly, they will become increasingly difficult to use for the next job and harder to clean, and their lifespan will shorten rapidly. Therefore, it is also important to protect paint brushes. For a hardworking painter, after a long day of painting, the thought of cleaning brushes and rollers can sometimes be the last straw. However, as skilled painters, we have some tricks to make daily painting tasks much more efficient.
One effective method is to use tape to protect paint brushes. When you dip a brush into a can of paint, the paint can seep up and get stuck in the joint between the bristles and the ferrule. In sunny or hot weather, quick-drying paint can even bond to the bristles and ferrule straightway. However, wrapping the joint and the base of the bristles with tape can help to prevent this from happening.


Following are the steps to protect your paint brushes with paper TAPE.
Choose the right tape protect paint brushes

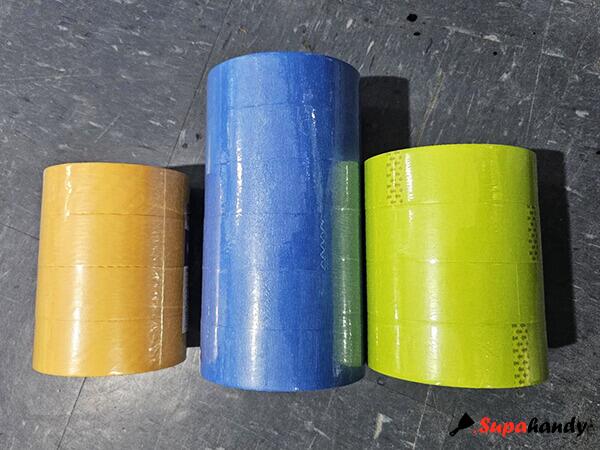
Painter’s tape, such as blue tape (36mm or 48mm), is the optimal choice. It’s highly effective in preventing paint from seeping through and is much easier to clean up compared to ordinary packaging tape or ordinary masking tape. The blue tape is thick enough and has good adhesion, which ensures that even if you accidentally dip the brush too deep into the paint can, the overlapping layers of tape can prevent paint from penetrating.
Green tape can also be a viable option if it’s of heavier duty. However, it’s essential to avoid using ordinary masking tape or packing tape. Ordinary masking tape doesn’t adhere well enough and can easily allow paint to seep through, while packing tape is not designed for this purpose and won’t provide adequate protection.
Yellow paper tape is another suitable choice that can be considered. It shares similar properties to blue and green tape in terms of protecting the brushes from paint.
Wrap the brush overlap by tape
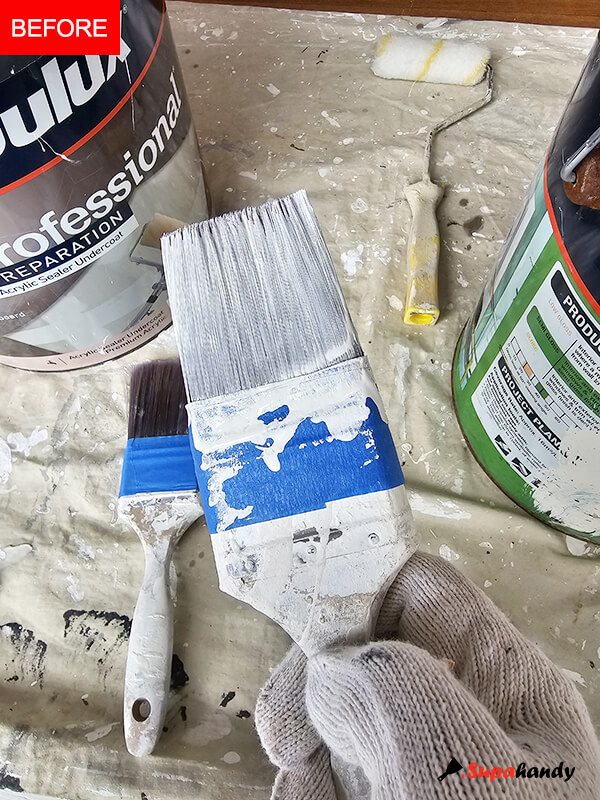
Begin at the metal ferrule to the bristles and tightly wrap two to four circles of tape around, ensuring the base of the bristles is covered. The tape should overlap the bristles by a short distance, such as 5mm to 15mm, leaving most of the bristles free for normal use.
If you’re a messy painter, it’s recommended to keep wrapping the tape around the handle.
Dip brush in paint not overflow tapes when painting
A brush should ideally be dipped no more than about one-third of the bristle length into the paint. But sometimes we accidentally dip most of the bristles or even part of the ferrule in the paint, especially when we’re in a rush to finish over ten windows/doors frames in one day and fill more than half of the cut pot or cup with paint.
When painting, the wet tape may loosen. Loosened tape gets in the way. Changing tape on a wet brush is messy. The best thing to do is stop using this brush and use another one. That’s why we recommend good-quality blue tape (or green or yellow tape) instead of normal masking tape. Overlap the tape a few times so each layer sticks better.
Remove the wet tape carefully and clean brush easily
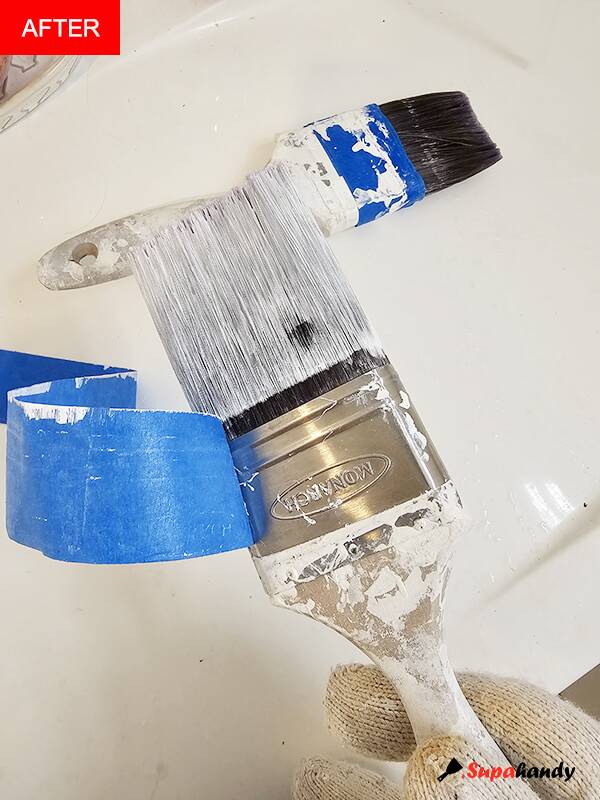
When painting is done, the wet tape is easy to peel off. Especially when we wash the brush in water for water-based paint (or mineral turpentine for oil-based paint). Remove the tape carefully so you don’t mess up yourself or those around you. Then you’ll see a nearly clean joint between the ferrule and the bristles.
You’ll also find that cleaning brush is easier. Most of the paint is still wet and only on the exposed bristle section. Little paint may have seeped inside the wrapped bristle or the ferrule or handle joint. But it’s also wet and easier to clean. This is different from when there’s no tape protection. Then a lot of paint gets stuck or dries and is hard to clean.
Using tape to protect paint brushes is the most practical method for prolonging their lifespans
In conclusion, using tape to protect paint brushes is a simple and effective method that not only reduces the effort required for cleanup but also extends the lifespan of the brushes. Remember to choose the right tape and follow these steps for a smoother and less troublesome painting experience.
